<-!->

Home About Beauty Fashion Lifestyle Shop Image Map

Sunday, September 29, 2013

Outfit of the Day: Animal Print, Pumpkins and High-tops, Oh my!


Yesterday felt like such a fall day, I loved it. It did get a little too warm for this outfit mid-day (luckily we went home for a while before going to dinner) but it was a nice change. 


I love the shirt I'm wearing because it's so versatile. It's really light so I wore it a lot in spring/summer but it has such great colors for fall/winter so I just layer it up. I added the military-inspired jacket because even though it's subtle, it added some color to my outfit and went really well with the burnt orange socks I wore.


I love these high-tops. I wanted a pair of high-tops for SO long but never bought any because I wanted to find the perfect pair for me. When we went to the outlets last year I saw these and loved them. They're converses but they're thinner than the normal ones and they're leather so they're perfect for fall and look a little more "dressy" than the typical canvas pairs.


I love the pants I'm wearing and I have several pairs of similar ones because they are a cottony spandex material so they look as skinny and tight as leggings but they are technically pants because they have a zipper/button and back pockets; these are all pluses because with leggings you have to worry about having a long enough shirt to cover your bum AND most leggings are thin so these take care of both of those problems.

Black tank: Forever 21
Animal Print top: Loft
Jacket: Forever 21
Black pants: love fire brand from Belk
Socks: Forever 21
Shoes: Converse

PS. Sorry about the crazy faces I'm making in the photos! This was kind of an awkward ootd photo session and I had to salvage the photos that we got! haha

I hope you guys are having a nice weekend and look out for more photos from this day! We went to a local Farmer's market and got some goodies! :)


Friday, September 27, 2013

The BEST Banana Nut Bread


Okay, okay, the bread isn't really spooky. Well, not unless you do the optional step of adding Halloween sprinkles to the top! Sure, normally you don't add sprinkles to banana bread, but I couldn't resist the urge to make it festive!


Ingredients:
  • 1/2 cup butter, softened
  • 1 cup of brown sugar
  • 2 eggs
  • 1 tablespoon vanilla extract
  • 3 ripe bananas
  • 2 cups of all-purpose flour
  • 3 teaspoons of baking powder
  • 1/2 teaspoon salt
  • 1/2 cup chopped walnuts 
The first thing I do is mash up the bananas with a fork and go ahead and preheat your oven to 350 degrees F (175 degrees C). Then, lightly grease a 9x5 inch loaf pan.


In a large bowl, cream together the butter and sugar until light and fluffy. 
Stir in the eggs one at a time, beating well with each addition. 
Stir in vanilla and banana.


 In a separate bowl, sift together flour, baking powder, and salt.
 Blend the banana mixture into the flour mixture; stir just to combine. 
Fold in walnuts. 
Pour batter into prepared pan.
An extra step I always add is to sprinkle the top with extra brown sugar and press it down into the batter so that it doesn't burn (it creates the yummiest crust!)
Bake in preheated oven for 1 hour, until a toothpick inserted into center of loaf comes out clean.


This recipe is so delicious! I promise you will love it! I like to leave my bananas a little chunky so that you can really taste it once the bread bakes, and you can even see banana chunks when you cut into it, along with pieces of walnut which is so lovely. Also, the brown sugar IN the batter makes all the difference. I love this recipe because it doesn't call for a ton of ingredients, and the ones it does call for are basic, but it comes out so amazing.

I wish this was my recipe, but I actually found it here on allrecipes.com. One thing I do differently that I didn't mention is the number of bananas. The original recipe calls for 4 bananas, but I think that 3 is enough for the amount of batter that this makes and it is still super moist.

PS. If you need to convert the measurements, check out this conversion calculator, here.

Happy Baking!

Thursday, September 26, 2013

DIY: Studded Loafers

I don't know about you guys, but I love loafers for fall. I feel like loafers have a bit more personality than ballet flats (which I still love, don't get me wrong), and they are perfect for the in-between weather where it's too warm for boots, but too cool for sandals.

Last year I bought this pair of plain black loafers by Steve Madden because they are the classic loafer shape, good quality and I figured black was a good color I could get a lot of use out of dipping my toe into the loafer pond for the first time. This pair isn't on the website anymore, but you can find loafers everywhere now, and of course, you don't have to stick with black, you can glam up any color or pattern that you like!

The problem I found with them was that they were too plain and I like masculine-looking pieces but I wasn't finding myself wearing them. They needed some jazzing up and I knew studs were the way to go. This is also a great alternative to buying a pair that are already studded because depending on where you get them, they might be much more expensive if they come studded.


Step 1: Gather Supplies

What you'll need: 

        1. Studs- I chose silver pyramid studs; Make sure you get the ones with the prongs to make sure they stay in place. I got mine from Hot Topic, but you can google or go on ebay and find them for pretty inexpensive.
        
        2. Pliers- I started out with this pair of jewelry pliers, but ended up switching to a pair that were flat on the end, instead of pointed- you'll see later!


 Step 2: Play around with different patterns

Before I began this project, I googled studded loafers to see how the studs were arranged on loafers that you can buy already studded.


Step 3: Once a design is chosen, push the prongs through the material

The material is probably going to be pretty thick, so just be careful that you don't rip anything and watch your fingers!


    It's going to look something like this at this stage.


Step 4: Use pliers to pull the prongs through


Once you have pushed the stud through as much as you can, take the pliers and pull the prongs as far through to the other side as possible. This is going to ensure that the stud is secure and that nothing will be able to get in-between it and the shoe to pull it out.


Step 5: Push the prongs down with pliers


This is when having a pair of pliers that are more flat on the end will come in handy. All you need to do is clamp down on the prongs and push them as flush to the material as you can so you avoid any of them scratching you when you walk (trust me, I speak from experience).

Step 6: Repeat with all studs 
until your pattern is complete!


And we're finished!
All you have left to do is style them! 

I chose a very simple design, if you can even call it that. I just wanted a little something extra on there to embellish them a bit and add some character, and this did the job perfectly. There are so many different colors and styles of studs and designs you could choose from, the possibilities are endless! And you don't have to stick to loafers, or shoes in general. You could embellish a purse, sweater, belt, anything! Let me know what you guys think and if you've ever done this!

Tuesday, September 24, 2013

My Favorite Fall Nail Polishes


Okay, I can't hide it anymore...I love reddish, purpleish, burgundy colors in the Fall. Oh, and military green...

I've tried other colors, like navy, chocolate browns, etc, but there's just something about vampy colors in the fall that I just love.


The first polish I want to share is the cult favorite: OPI Lincoln Park After Dark. Mine is so old and used up, but I can't part with it until I buy a new one (weird, I know). After two coats on the nails, from a distance, it does look black, but when you look down at your nails you can tell that it's a very dark purple. I just love it, it's so chic. And when people say, "What's up with the black nail polish?" I get to say, "Um, it's not black, it's DARK purple, duh."

The second polish is one I don't hear anyone talking about, it's called, Malaga Wine by OPI. It's a rich burgundy red. It's not too dark, not too bright, it's just right. (Goldilocks, anyone?)


The third polish is by Revlon and is called Vixen. It's a very deep burgundy (sounds familiar, I know) but with more purple undertones. It's very deep, dark and vampy. This is probably my favorite of the bunch with Lincoln Park After Dark at a close second.

Fourth is The Thrill of Brazil by OPI. My sister's wedding colors were red, white and black and this is the nail polish color she chose at the salon (see picture in the background below of my step-sisters and I at her wedding!). This is a really pretty true red. It doesn't have orange undertones, it isn't a candy red, it's a...sophisticated red :)


Last but not least, is Safari Chic by L'Oreal. I love the name, by the way, and it's so accurate. The safari, military greens have been "in" the last few fall seasons and is in again this season and this is it bottled up!

Let me know what polishes you guys love for the Fall season and give me some suggestions, if you have them, for some other color families for me to branch out into!

Monday, September 23, 2013

Outfit of the Day: Summer to Fall Transition

I'm SO excited that yesterday was the first day of Fall! It's been getting a little more chilly outside recently and I've been loving it. Fall is such an exciting season because the leaves begin to change, the holidays get closer and closer and the pace of life just seems to slow down.


This outfit was from this past Saturday, the 21st. We were just running errands and exploring the areas around where we live now, trying to get better acquainted.

We also finally went and saw The Family with Robert De Niro. We really enjoyed it; it was funny, it had action, romance, suspense- honestly, there was something in it for everyone.

Now to the outfit...

Sometimes it can take me a while to get dressed, especially because I feel like it's been hot outside for so long that I just kept wearing the same outfits over and over. But with the temperature change, it's been warm enough to wear summer clothes, but cool enough to add a few pieces that I haven't been able to wear since last year, so it's felt like a new wardrobe.


I chose this dress because I wanted to wear something that was easy, but when I put the sweater on over it, it had the perfect summer to fall transition.

The green is kind of a chartreuse color, which is great for the transition because it isn't a bright color, like a lime or neon green. Also, the plain, high neckline is great because it shows no skin, so that area won't get cold, but it also has no ruffles or frills that would make it look more like a summer dress.

The taupe cardigan gives the outfit some shape and interest and perfectly converts this summer dress to fall.

I just wore a pair of nude flip flops since we were running around all day, but you could wear a pair of flats or even boots to make it more fall appropriate.

Dress- Loft
Cardigan- TJ Maxx- by Valerie Bertinelli
Watch- Michael Kors
Flip Flops- Kohls- by Lauren Conrad

It's still warm enough to get away with bare legs so I'll keep enjoying outfits like this for now but when the temperature drops even more I think I'll have to say goodbye to this dress because I don't think it'll look very nice with tights. It's a summer dress at heart and I'm just extending its wear :)

Let me know how you guys are adjusting your wardrobes to the changing temperatures!

Saturday, September 21, 2013

Foundation Fails

Happy Saturday, Everyone!


Recently, I have been on the hunt for a good drugstore foundation. The hunt has become a mission, really. I finished up a Revlon Nearly Naked, which I liked but wasn't a great color match for my skin because it was too pink. Then, I bought the Covergirl Outlast Stay Fabulous that everyone had been raving about and I thought it was a great foundation, but the color was too dark for me and I got tired of trying to blend it and make it work everyday. 

Once I decided that enough was enough I went to Target to buy Revlon Colorstay. Whenever I try a foundation I don't like, I always remember that I have good ol' Revlon Colorstay in my back pocket. I have bought it so many times and it was always my go-to when I wasn't sure what to use. Unfortunately, Target not only didn't have my shade, but they didn't even carry it because there wasn't a slot for it on the shelf! Determined not to have to deal with a too-dark foundation one day longer, I decided I wasn't leaving the store without something new. Then I remembered I heard amazing things about the Garnier BB Cream for oily skin, which I reviewed recently. Well if you read that post you already know how that story goes. I bought the BB cream, thought it was great, but once again, it was too dark for me and returned it.

I did end up finding my shade of Colorstay somewhere else, but I found that it looked horrible on my skin for some reason. I have pretty oily skin, but on the non-oily parts, it made it look so dry, and it accentuated my pores terribly. I used it for a couple of days and tried applying it different ways, but nothing worked. It looked horrible and the smell, which never bothered me before, lingered all day and I just couldn't take it, so I returned that too.

On my most recent adventure to the drugstore I bought The Maybelline Fit Me Liquid Foundation, which I have used before but it was so long ago I couldn't remember my opinion. I have only been using it a couple of days and while the color IS light enough for me this time, I won't lie, I don't love it. It does have pretty good coverage, seems to last a while, has no smell, but it doesn't look nice on the skin. It also never feels like it has set, for example, when I touch my face, it doesn't feel smooth, it feels tacky. I think this is why it doesn't look nice, it doesn't blend into my skin, it sits on top of it.

As for the concealer, I have been wanting to try this for such a long time. I've heard great reviews about how well it works as an under eye concealer and brightener. So far I have been enjoying it, but I'm sure I'll do a full review of it later!

I hate that this post sounds like I'm so picky, but I just haven't been enjoying doing my makeup lately because the base just doesn't look good and to me, that's the most important part. Also, I don't normally have this much trouble liking something so I don't know if it's just me, or if it's the products! Help!

Please give me suggestions on what I should try next!

Thursday, September 19, 2013

Tour: My Vanity!

Good Morning, everyone! Since I graduated from college I have been without a place to properly put on my makeup. In college I turned my desk into a vanity all 4 years because I hate doing my makeup out of a makeup bag and I like to be able to sit down while applying it. I wanted a place then, and now, to lay out all of my products and organize them in the order that I put them on my face.


After continuous searching, I finally made up my mind that this is the vanity that I wanted. It's the MALM Dressing Table from Ikea in white. I love it in white, I think it makes it even more feminine looking. I also like that it has a long drawer for storage.


As you can see, these are closer pictures of what I have on the top of the vanity. I try to keep it minimal and un-cluttered. I was really surprised when I went to the Dollar Store a few weeks ago and I even did a post on some storage containers I found (check it out here). While I was there, I found the glass containers which is exactly what I was looking for. I think look so nice and the glass is really thick for a dollar!


The clear storage cube has the products that I've been reaching for the most lately. I have it organized by the order that I put the products on my face and I can do my entire routine solely from these drawers if I wanted to.


I'm not going to talk about each product, because even though I don't have THAT much stuff, it would take forever!

In this section, I used a divider tray that I already had and in the back left corner I have some powder puffs and sharpeners. Next to that, I have products that I don't use often, like eyeshadow palettes, gel liners, etc. In the middle section I have a couple of powders, foundation, concealers and a couple of Benefit highlighters that had no other home!
 Up front I have a few disposable sponges, a hand sanitizer, a couple of sample packets and Q-tips, which I use pretty much every day when I do my eye-makeup. Lastly, I have a section that I put extra mascaras and eyeliners in.
I got these white trays from Walmart for super inexpensive and they work perfectly. Here you can see I have a tray of different types of bronzers (except for my Soap & Glory powder) and next to that is a tray of blushes.
And finally on this end, I have a tray of lipglosses, lipsticks and lipliners to finish off my makeup.
I also have some regular headbands and some fabric headbands at the end here because I was planning on also bringing my hair tools in here and doing my hair and makeup sitting at the vanity, but I haven't done that yet, so for now these are here. If I take the hair accessories out, though, it's nice to know that I have some room to grow with my makeup if I wanted to.


So that is the tour of my vanity. As you can see, I have more makeup than your average girl probably does but no where near the amount that you see some of the Youtube beauty gurus have in their collections. I like how I have this organized and the fact that everything is laying flat and nothing is really on top of each other so I can see everything I have. Of course, if I expand my "collection" I could stack products and still have room in the drawer for more products.

I still have a few changes to make that will happen eventually such as getting a new mirror (the light bulb burned out and is useless now), but luckily I'm in front of two windows so the lighting hasn't been an issue yet, and I don't have a chair to match. I've just been using a desk chair.

Hopefully this was helpful in some way. I know I like to see how other people have their things organized. Let me know your setup and if you have any comments or suggestions for me! 

Friday, September 13, 2013

Things Worth Sharing

Today's post is an idea that I got from Alex or HRH Collection on Youtube. She recently did a video that she called "Things Worth Sharing," and the idea behind it is that it isn't a "Monthly Favorites" post, but just random things that might be interesting or useful to share with others. Here goes!


The first thing I want to share is a trick to get more use out of a dark lipgloss. I generally like nude lips and when I say nude, I mean that beige/pinky nude that is close to my skintone. What nude lips really are are your actual lip color, and that is the look that I achieve with this lipgloss trick. I've never liked a product that is my lipcolor, but I think because it's a gloss and it gives a pretty shine, this was actually a hit with me. All you do is pull a darker colored lipgloss and wipe some of the product off before you apply it, then apply a sheer layer over your lips. It looks very natural and very pretty because of the shine and the hint of color you wouldn't get with a clear gloss.


The second thing I want to share with you guys are Gear Ties. The ones we buy are from a company called Nite Ize. What they are are reusable twist ties, essentially, and they are so handy! They come in lots of lengths and colors, but we like the 3 inch and 6 inch ones the most because they are so useful around the house. In the pictures you can see them used under a desk to keep all of the cords under control, to wrap headphones and wrapped around the cord to the Keurig to keep the cord hidden (I hate seeing the cords to appliances on the counter).


I want to share this bracelet with you guys in case you haven't seen it. I found it on Pinterest and my boyfriend surprised me with it last summer and I wear it almost everyday. It is so pretty and dainty and perfect for those of us that like to wear multiple bracelets and watch combinations but don't like to hear them clanging around on our wrists all day! It's gold filled so it won't tarnish and of course, you can personalize it with any initials. The seller on Etsy is Bellatrina Jewelry.

Yep, we are all over the place with this list you guys, but next up is the Tide to Go Pen. I had never bought one of these before (and still haven't) because they are a little expensive. I got two of them for free in a goodie-bag type thing at my college and I have them in my two most used purses. They really do work and have saved myself and my friends/family on a number of occasions. The commercials can be a little misleading because after you use it the spot does have to dry, so it isn't magically going to go away, but it only takes a couple of minutes to dry and you'll be good to go. When mine run out, I will definitely be buying more, because you'll use them more than you think.


Last but definitely not least, is my necklace holder. I always have trouble figuring out where my necklaces are going to go because most of them are so long. Before we moved, the closet had a different closet system installed but had basically this same rack that pulled out with hooks. Luckily our new place came with a closet system as well (different brand), so we were able to install one here too! It's called a Tie & Belt Rack, but it also works perfectly for necklaces! I love that it slides away so it isn't taking up space but when I pull it out, I can see everything I own perfectly.

Let me know what you guys think of this post! :)

Wednesday, September 11, 2013

My Decorating Philosophy

When I decorate, what I like to keep in mind and what I consider to be my "decorating philosophy," is layering. This isn't a technical or formal term by any means, it's just the best way I know to describe what I do to achieve a look that I like when it comes to decor.

So what do I mean by layering? Basically this means accessorizing, but more specifically, it means grouping items or adding one item on top of another and this can be items of differing heights, styles, textures, etc. I could ramble on and on, but the best way to explain it will be to show you!


This first picture is of my bedroom at my old college apartment. It came furnished (none of which you can see in this picture, except the bed) with a dresser a desk and the bed which had a plain wooden headboard. As you can see, though, I made my own headboard with a gray floral pattern fabric, which we will call Layer #1.
Layer #2: Matching white pillow cases
Layer #3: Purple ruffled pillows (texture & color)
Layer #4: Black victorian patterned pillow (different pattern from the headboard and the black goes with the furniture and the curtain)
Layer #5: White damask comforter (same style pattern of the pillow)
Layer #6: Heavy black curtain
Layer #7: Light and flowy purple curtains (brings the purple back, but in a different shade)

You can also see that I have flowers and decorative boxes that are all within the black, white, purple color scheme, but what I loved was that it wasn't too matchy-matchy, it had a boldness to it from the black, but at the same time, it felt princess-like with the purple ruffles and light, flowy curtains.

As you all know, I just moved, which is what inspired this entire post. The remainder of the pictures though, are just going to be of specific examples of how I incorporate layering into home decor and not entire rooms worth because none of the rooms are complete yet! haha


Guest Bathroom: Simple example here- textured purple and white towels layered one on top of the other, with a decorative box (which houses cards I've received and other memorabilia throughout the years) on top of the cabinets. I love to layer hand towels this way, to me, it just looks so much more "done" than tossing one hand towel over the bar and calling it "good-enough."


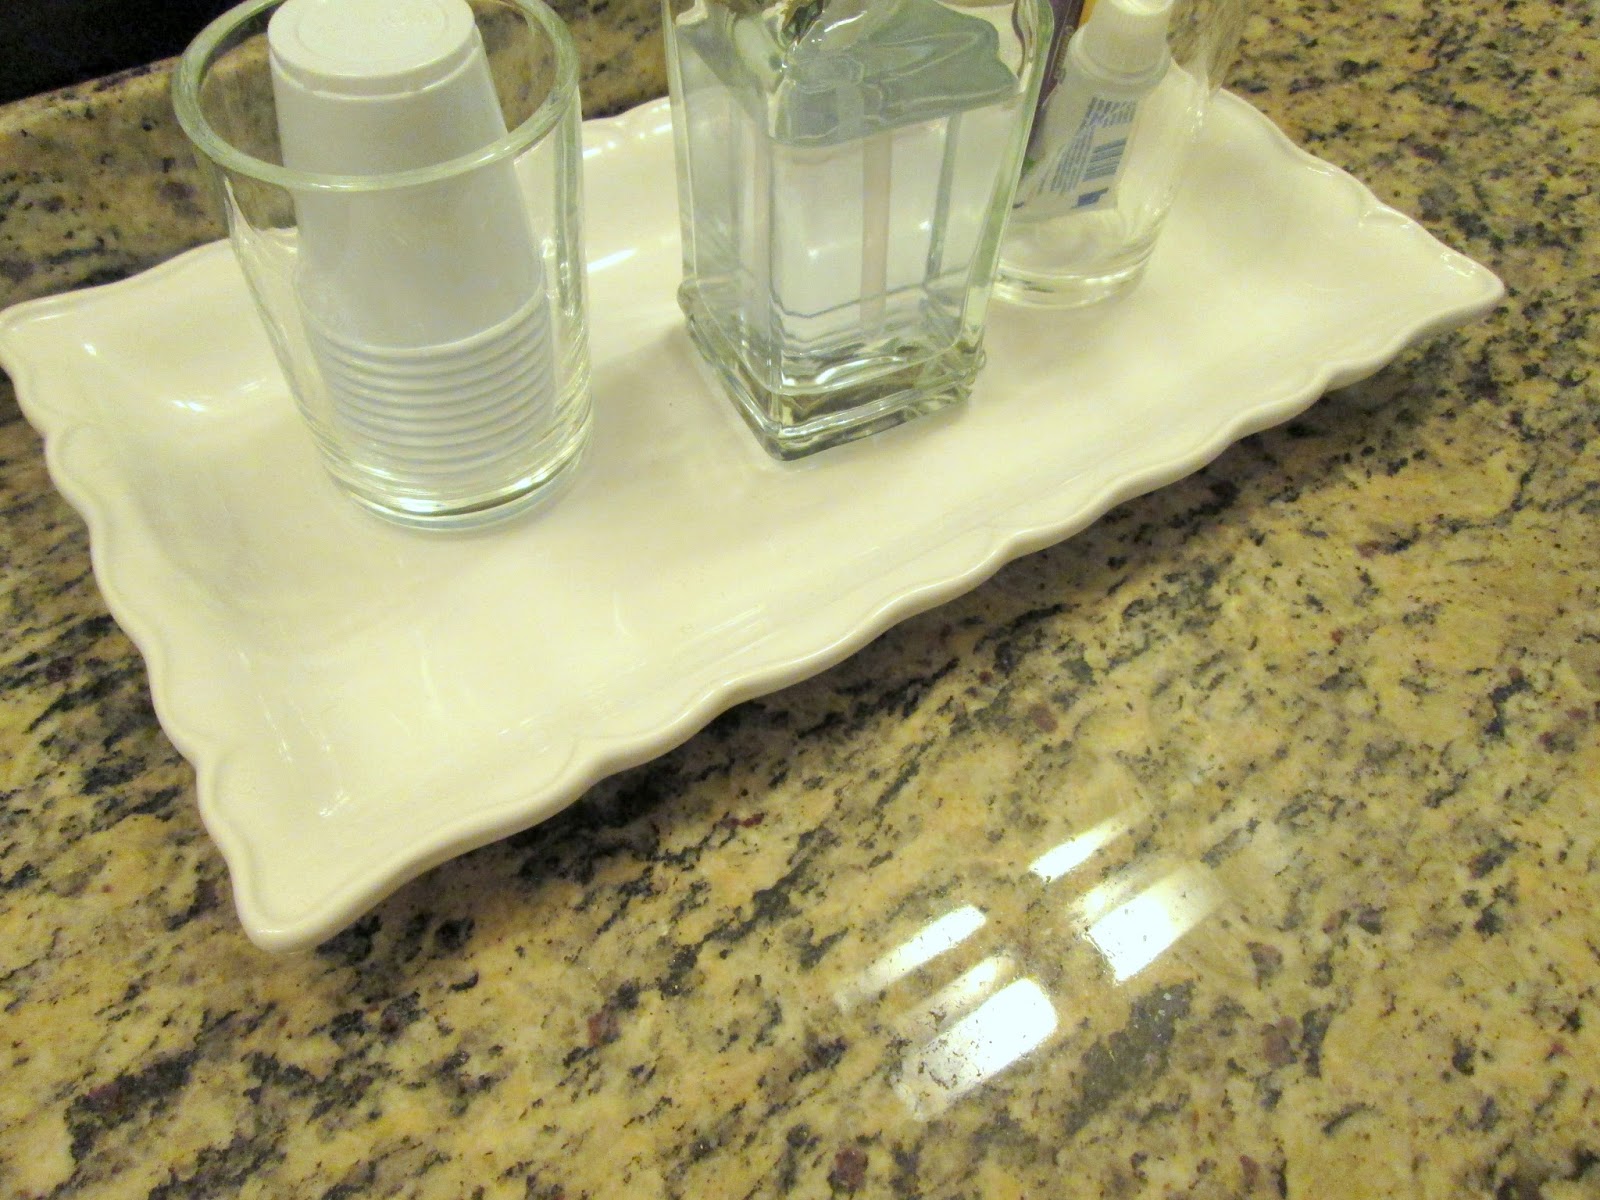
Master Bathroom: I got this decorative plate from Pier 1 and since we have double sinks, it anchors the cups, soap dispenser and toothbrush holder in the middle of the counter instead of these 3 things floating out in the middle. The wavy edges to the plate are also a nice contrast to the straight lines of the holders and soap dispenser.


Dining Room Table: I noticed such a difference after we accessorized this table, the whole "living area" just looked like it was coming together. We put this brown and gold detailed table runner down first, then added a mirror plate because mirrors automatically add another layer in with the reflection, and then added three candles to give it some height and dimension.


Sofa: The sofa we have now is pretty small and slender, which works because the living room area itself is small, but I found that adding a plush throw blanket in the same color to the back "beefs it up" a little. And yes, my purple ruffle pillows have made a return because they add some color, more texture and a little femininity to the space. I really like the pillows layered together this way because of the masculine-feminine vibe from the ruffles, the colors and the map pattern.


Kitchen Island Centerpiece: We have a pretty large island in the kitchen and at first, we were going to keep it empty, but I pulled this cylinder hurricane vase with the candle out of a box and plopped it down on the island. It looked nice with just the candle in it, but I thought it would look even better once I incorporated a little "layering" into it. Also, I thought it would make it look more like it belonged in the kitchen. We went out and bought whole coffee beans, added the candle on top and now it looks a little more "done" and it smells amazing when you walk by!

What I love about layering is that it just makes things look more rich or grand. Layering adds visual interest to an area and can make something drab look more exciting, unique or plush. 

Hopefully you guys were able to stick through the whole post and learn something or be inspired by my decorating philosophy :)

Monday, September 9, 2013

Garnier Skin Renew BB Cream- Combination to Oily Skin

I never really jumped on the BB Cream bandwagon, simply because I like coverage and it's difficult to find a BB Cream with coverage. I've bought two BB Creams since they began to come out, the first was the original Garnier and the second was the Olay Fresh Effects. There was many months inbetween the two purchases, but I returned them both. They had no coverage (I didn't expect full coverage, but for me, it's pointless to put something on my face that does absolutely nothing), and they made my skin SO oily looking.

After hearing that the Garnier BB Cream for combination to oily skin was nothing like its predecessor, I made a mental note to get it at some point and try it out. What gave me the push to actually purchase it was when I went to Target and they didn't have the shade of Revlon Colorstay that I was looking for, so here we are :)


The shade I bought was Light/Medium and right away I noticed how runny it was. It literally just seeps out of the tube.


Surprisingly, despite the thin and runny texture, this product had really nice coverage. I still used a concealer over certain places, but I do that anyway.  As you can see from the swatch below in natural light, it dries to a pretty matte finish, not nearly as shiny or oily looking as the original.

It applies very easily. I used my fingers, which I never do, but it seemed to work the best with this product. It lasted throughout the day and continued to look nice, although I could see some signs of wear, but for a product that isn't technically a foundation, and doesn't claim to be long-wearing, I was impressed.


Unfortunately, the only reason I went to purchase a new foundation in the first place was because the one I was using was too dark for me and no matter what I did, my face was noticeably darker than my neck. I really wish Garnier had an even lighter shade than Light/Medium because I had to discontinue use of it because I was still having the same problem.

If your skintone is within their shade range, I would definitely recommend this product. I think it would actually work with with all skin types, not just combination to oily because it isn't a completely matte finish (but it's enough to satisfy combo-oily skin people), and it doesn't cling to dry patches. Also, it is SPF 20 and is a great value for the price because you get 20 fl oz (60 ml), which is double the amount of a regular foundation for around $11.

Have you guys tried this product? What do you think of BB Creams? Let me know!

Check this one out here.

Saturday, September 7, 2013

Milani Brow Tint Pen

Hey everyone! Sorry I've been gone this week, we moved this past Monday and are STILL unpacking! It feels like it will never end! haha. Anyway, I hope you enjoy this post about a product that is a little unique in my opinion, but that I've been loving.


This is a product that I've heard about from Emily from Beauty Broadcast or emilynoel83. She did a YouTube video with her mom and her mom spoke about how much she loved this product. I believe Emily also featured the product in a video she did and mentioned that she used it because it was the fastest way to get her brows done.

I was in need of a new brow product and was having problems finding one that didn't have a red or orangey undertone.


I was skeptical of this product from the beginning, though, because it's not your typical pencil or powder. It seemed strange to put a liquid product through your brows, but as I said, Emily mentioned that it was a fast way to do your brows so I figured I'd give it a shot.


This product has a fine felt tip that helps with accuracy and making sure it still looks natural. It is surprisingly easy to blend, and I say that because when I think liquid, I think sharp line that's not going anywhere, but not this product. As you can see from the swatch, it has a nice color, but it's pigmented like an actual eyeliner would be.


If you want very defined brows, this can do it for you, but at the same time, if you want natural looking brows that are just a little more defined, this is great too. 

How do you guys do your brows? Also, let me know if you've tried this!

Related Posts Plugin for WordPress, Blogger...